Table of Contents
- The Basics
- Gearing Up
- Bait Boxes
- Useful Buffs and Upgrades
- Starting an Encounter
- Structure of an Encounter
- Dinosaur Behavior
- Catching Your Game
- Determining the Right Poison
- Managing Your Supplies
- Skinning the Beasties
- Scaring Beasts Into Hiding
- Rewards
The Basics
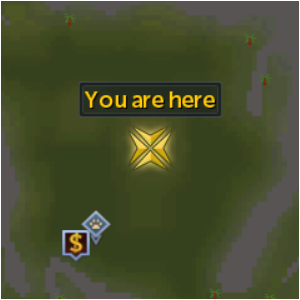
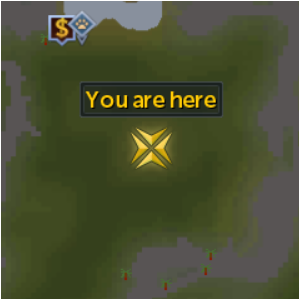
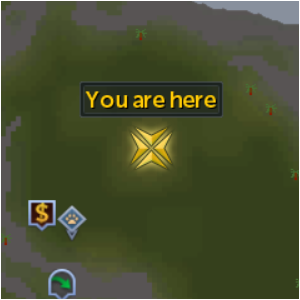
Big Game Hunter is a method for training Slayer and Hunter, and is an important part of the Anachronia skilling ecology. There are 9 different dinosaurs that you can hunt in this manner, each having their own clearing and required bait.
| Apoterrasaur | |||||
| Creature | Tier | Creature Image | Location | Level Requirements | Required Bait |
| Arcane apoterrasaur | 1 |  |
 |
75 Hunter 55 Slayer |
Raw shark |
| Spicati apoterrasaur | 2 |  |
 |
80 Hunter 60 Slayer |
Raw bagrada rex meat |
| Oculi apoterrasaur | 3 | 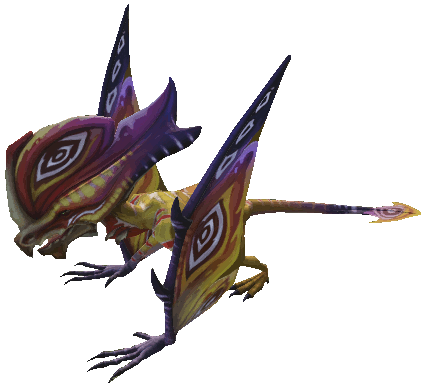 |
 |
94 Hunter 74 Slayer |
Raw asciatops meat |
| Quads | |||||
| Creature | Tier | Creature Image | Location | Level Requirements | Required Bait |
| Scimitops | 1 |  |
 |
75 Hunter 55 Slayer |
Raw sailfish |
| Asciatops | 2 |  |
 |
85 Hunter 65 Slayer |
Raw arcane apoterrasaur meat |
| Malletops | 3 |  |
 |
95 Hunter 75 Slayer |
Raw corbicula rex meat |
| Rex | |||||
| Creature | Tier | Creature Image | Location | Level Requirements | Required Bait |
| Bagrada rex | 1 |  |
 |
75 Hunter 55 Slayer |
Raw manta ray |
| Corbicula rex | 2 |  |
 |
90 Hunter 70 Slayer |
Raw scimitops meat |
| Pavosaurus rex | 3 |  |
 |
96 Hunter 76 Slayer |
Raw spicati apoterrasaur meat |
Gearing Up
To optimize your equipment for Big Game Hunter, your biggest priorities are the speed at which you gather your materials, your mobility, and your experience gain. The following table breaks down the best gear for getting the most out of this training method.
| Item Slot | Better ---------------------------------------------------------------------------------------------------------- Worse | |||
| Head | Nature's sentinel helm | Hunter's headwear | Seer's headband 1, 2, 3, or 4 | Lumberjack hat |
| Torso | Nature's sentinel chest | Hunter's chestpiece | Lumberjack top | |
| Gloves | Nature's sentinel branch | Hunter's gloves | ||
| Legs | Nature's sentinel trunks | Hunter's legwear | Lumberjack legs | |
| Boots | Nature's sentinel boots | Hunter's boots | Lumberjack boots | |
| Main Hand | Augmented Crystal hatchet | Augmented Dragon hatchet | Rune hatchet | |
| Main Hand Perks | Rapid and Honed | Refined | ||
| Off-Hand | Any augmentable off-hand weapon | Any augmentable shield | ||
| Off-Hand Perks | Mobile | Clear-headed | ||
| Cape | Woodcutting skillcape (trimmed or untrimmed) | |||
In addition to your gear, the effect of a Perfect juju woodcutting potion (or Perfect plus potion) can expedite encounters further.
Bait Boxes
At the site of each Big Game Hunter clearing, there are Bait box hotspots. These tie directly into the Anachronia Base Camp management system, and can be built up to three tiers. In addition to functioning as a bank deposit box, the bait box can store a set amount of each type of Big Game Hunter bait.
| Bait Box | |||
| Tier | Prerequisites | Resources | Benefits |
| 1 | Tier 1 Town Hall | 500  Wood Wood500  Hides Hides |
Unlocks access to a Bait box that has a capacity of 5 of each type of bait for Big Game Hunter |
| 2 | Tier 1 Town Hall | 5,000  Wood Wood5,000  Hides Hides |
Increases the storage capacity of your Bait box to 15 of each type of bait for Big Game Hunter |
| 3 |
|
100,000  Wood Wood100,000  Hides Hides |
Increases the storage capacity of your Bait box to 50 of each type of bait for Big Game Hunter |
Useful Buffs and Upgrades
You can buy the Quick Traps upgrade from Irwinsson's hunter mark shop to build and arm your scorpions faster.
Players with lower Agility levels may find equipping items that reduce their weight or using the Spa's Salt Water Spring pool buff helpful to avoid being in the detection range of the dinosaur. You can also gain the same buff by using an Ogre flask (salt water).
All three tiers of the Hunter Lodge (built in the Anachronia Base Camp) help you with Big Game Hunter.
| Hunter Lodge | |||
| Tier | Prerequisites | Resources | Benefits |
| 1 |
|
7,500  Wood Wood7,500  Leaves Leaves7,500  Hides Hides |
10% chance of gathering an additional resource from Woodcutting in Big Game Hunter encounters |
| 2 |
|
60,000  Wood Wood60,000  Leaves Leaves60,000  Hides Hides |
Big Game Hunter creatures take an additional 2.4 seconds to catch you |
| 3 |
|
120,000  Wood Wood120,000  Leaves Leaves120,000  Hides HidesReinforced dinosaur pelt |
One type of frog is removed at the start of each Big Game Hunter encounter |
Starting an Encounter
Once you have finished preparing for the encounter, it's time to get started. Head to the location of the dinosaur you are hunting, and be sure to have the appropriate bait in your inventory. Having at least 3 is recommended, but so long as you have a few to spare in your Bait box, you should be okay.
To start the encounter, click on the bait pad. If you have recently attempted to hunt another dinosaur using this method, the game will ask you if you want to shoo other creatures from the area in order to hunt the dinosaur, to which you say yes (this will make the other dinosaur go into hiding). Then it will ask if you are sure you want to begin the encounter, to which you must reply "Yes, I am ready!" To skip both of these steps, right click the pad and select "Quick start."
It's worth noting that if you do not have at least one of the necessary bait in your inventory or the inventory of your beast of burden, you will not be able to start the encounter.
Big Game Hunter Encounters are done as solo instances. Each encounter will have a few things in common. The first is the layout of the area. Each dinosaur's clearing is different from the others, but other than that its layout is constant. Below is an example layout for an encounter.
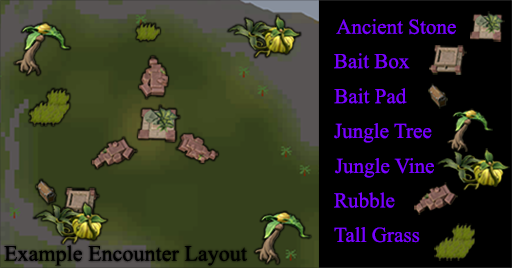
Each Big Game Hunter clearing, hereafter referred to as an "arena," will have a pressure plate in the middle, along with three piles of rubble. There will also be 2 spawns of jungle vines from which you will need to cut Jungle vine, as well as some jungle trees from which you will need to cut some Jungle logs.
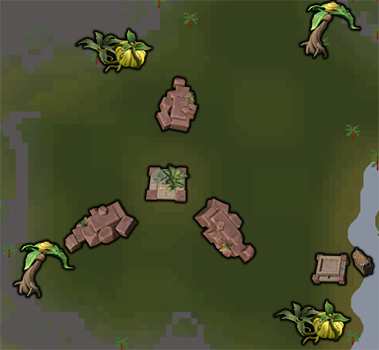
The location of the jungle trees and jungle vines are constant for any given arena. You cannot substitute other log types for this, it must be the ones found in the instance. A layout of the arenas are shown in the table below. Click the images to enlarge them.
| Arcane apoterrasaur | Scimitops | Bagrada rex |
 |
 |
 |
| Spicati apoterrasaur | Asciatops | Corbicula rex |
 |
 |
 |
| Oculi apoterrasaur | Malletops | Pavosaurus rex |
 |
 |
 |
Sometimes (but not always) the arena will include a patch or two of tall grass. The last major thing is the frogs. There are typically 3 different types of frog: Golden (yellow), Phantasmal (red), and Sky-blue (blue).
Generally speaking, when entering an encounter there will be a single dinosaur present. However, it is possible to have an encounter with 2 (1/16 chance) or even 3 (1/160 chance) dinosaurs. If an encounter is failed, the next encounter is guaranteed to only have a single dinosaur. Aside from specifics mentioned below, the behavior of the dinosaurs do not change based on how many are in the encounter.
In any encounter, the dinosaur you are hunting will have a set walking pattern. Their walking pattern is not a constant for the dinosaur, meaning that should a player complete an encounter and then immediately hunt the same dinosaur again, the walking patterns will likely be different. For the purposes of explaining this accurately, an example walking pattern is shown below.
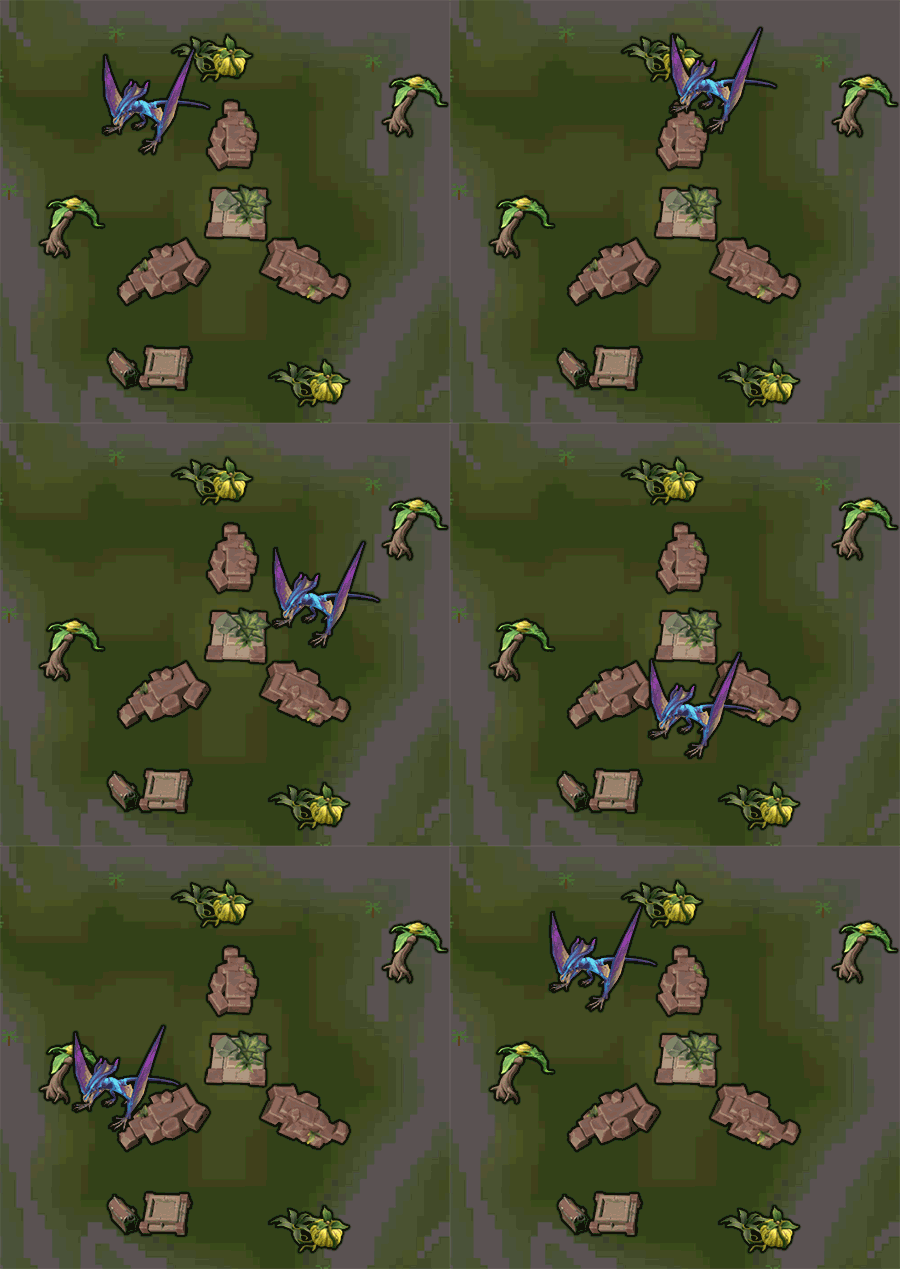
While the dinosaur takes its walk, it is surrounded by a colored circle that indicates how suspicious the creature is that a hunter is present. Light blue indicates that it is completely unaware of your presence. As the colors shift further from blue and closer to red, it is becoming more aware of you. When the circle is red and you remain in it, the creature will notice you and run away, ending the encounter.
While dinosaurs don't have the greatest eyesight, they have an excellent sense of smell, meaning that your presence within the circle makes them suspicious of your presence regardless of whether or not they have you in their line of sight. This is why the presence of the tall grass is relevant. When in the tall grass, your scent is masked, and the dinosaur will not make any progress in detecting your location. However, its suspicion of your presence doesn't go down while you are in the tall grass so long as you are also within the circle.
When only a single dinosaur is present, it will occasionally roar loudly. When it does so, its circle briefly disappears and then it resumes its walking pattern, but in the opposite direction. Note that this means in an encounter with multiple dinosaurs, the dinosaur who is alive last starts roaring once its companions are dead. Below is a representation of the example walking pattern with this mechanic taken into account.

It is possible for jadinkos to randomly spawn in the arena. This will occur only in encounters with a single dinosaur present whose tier is 2 or 3. When they do, the dinosaur will stop moving briefly and its indicator circle will disappear. When it begins moving again, it will go straight for the jadinkos and eat them.
When the dinosaur reaches the jadinkos, it will eat at least one of them, and the remaining jadinkos will run away. From this point, the dinosaur will take the most direct route to its previous path, and continue to follow it in the same direction as before. If the dinosaur was going to roar while it was working on the jadinkos, it will roar before it resumes its previous path, and thus switch directions as normal. Note that this mechanic means that it will go to the closest point on its path from where it ate the jadinkos, not to the point it was at when it began beelining for them!
Finally, it is important to note that when a player finds themselves in very close proximity to the dinosaur, they will be stunned for 2 seconds: "You get caught under the weight of the creature and are left stunned." Being caught in this manner doesn't mean that you will get noticed by the dinosaur and fail the encounter. You can escape the stun with the Freedom ability, as with most stuns, and will still only be caught if you remain within their circle for too long.
So now that you know how to avoid failing the encounter, let's cover actually succeeding. Successfully catching the dinosaur requires the use of the resources found in the arena. There will be jungle vines and jungle trees that you can cut; you will need at least 3 Vines and 7 Logs in order to successfully complete the encounter.
The three piles of rubble in the center of the arena are where you will set your traps, called scorpions. They will each fire a poisoned spear when triggered and are constructed in the rubble piles using 1 Jungle vine and 1 Jungle log. Doing this takes 6 seconds (4.2 with the Quick Traps upgrade) and awards 250 Hunter experience.
In order to trigger the scorpions, you must rig the ancient stone that rests in the middle of them to act as a pressure plate, which requires a Jungle log. Doing this takes 9 seconds (6 seconds with the Quick Traps Upgrade) and awards 250 Hunter experience.
Finally, you must have spears in the scorpions to fire. Each Spear is Fletched from a Jungle log over 2.4 seconds and awarding 10 Fletching experience. They cannot be loaded unless they have first been poisoned. This is where the frogs come into play.
Each encounter will have all three types of frogs (unless you have built the tier 3 Hunter Lodge). Each one is randomly assigned a set amount of damage. One of them will deal 7,500 damage, another will deal 15,000 damage, and the last one will deal 30,000. If you have the tier 3 Hunter Lodge, then only two frogs will be present. One of them will deal 30,000 damage to the dinosaur, and the other will randomly be assigned to deal 7,500 or 15,000 damage for the duration of the instance.
In addition to removing frogs with the help of the Hunter Lodge, players can also remove one of the two least effective frogs in an encounter with the use of Frog repellent, which is purchased from Irwinsson for 10 hunter marks each. If you have the tier three Hunter Lodge, then using a dose of Frog repellent will drop the encounter to a single frog guaranteed to deal 30,000 damage per spear. If you do not have the tier three Hunter Lodge, then you can still use two doses of Frog repellent in the same encounter to immediately determine the 30,000 damage frog.
It is worth noting that the dinosaurs always start with 90,000 hitpoints, so if you pick the frog whose poison deals 30,000 damage for all three spears, you will kill the dinosaur who triggers the trap in one go. The frogs and spears are listed below.
| Poisoned Frog | Resulting Spear |
Golden poison frog  |
Wooden spear (golden poison)  |
Phantasmal poison frog  |
Wooden spear (phantasmal poison)  |
Sky-blue poison frog  |
Wooden spear (sky-blue poison)  |
To poison a spear, you must have one in your inventory and then either use it on the frog or left click the frog (extract poison). Doing so awards Herblore experience equal to the player's Herblore level and takes 3 seconds. It is also possible to start the process of extracting the poison by using the Bladed Dive ability on them, allowing the player to dash to them to expedite the process.
Typically an arena contains 7 of each frog type that is present. Once poison has been extracted from a frog, it takes some time (3 minutes) for the poison to replenish itself. During this time the frog is green. When the poison has become plentiful enough to be extracted again, the frog will return to its original color.
Once you have three poisoned spears, add them to the scorpions to arm them. You can left click and the select your color, but it is faster to either use the colored spear on the scorpion or to right click and select the color that way. Arming them awards 250 Hunter experience and takes 6 seconds (4.2 with the Quick Traps Upgrade).
Once the scorpions are all armed and the ancient stone has been set up to trigger them, you must lure the dinosaur onto the pressure plate by adding the appropriate bait to it. Doing so awards 250 Hunter experience and takes 2.4 seconds (1.2 with the Quick Traps Upgrade). If not all the scorpions are built and armed, the player will be asked if they want to bait the trap anyway.
Should the dinosaur survive the first barrage it will typically destroy at least one of the scorpions, forcing the player to rebuild it. The damage each spear deals is displayed in the color of the frog whose poison dealt the damage. Thus, if a blue damage number is 30,000, then you now know that in that encounter the Sky-blue poison frog's poison will deal 30,000 damage.
In addition, know that so long as you continue to kill the same dinosaur breed, the damage amounts that are tied to each frog's poison are constant. The only way they get rerandomized is if the creatures go into hiding. This means that even if you leave an encounter, go to another place in the world, log out, log back in, and start up an encounter with the same creature, the damage amounts associated with each frog and its poison will still not have changed.
As one would expect, when a dinosaur's hitpoints are depleted they will die on the ancient stone, allowing you to skin them. Doing so takes 6 seconds, so in an encounter with multiple dinosaurs this must be carefully timed. When a dinosaur is killed, the pressure plate cannot be reset until the creature is skinned.
Determining which poison is optimal for the dinosaur can be done several ways, but two of them are more efficient than the others. The first one can be done whether a player has three frogs in the encounter or two, and is commonly referred to as the "two-spear" method. The way it works is the player sets up two traps, each with a different poison. The displayed damage numbers from when the trap is set off will tell the player what the strength of the two poisons are. If one of them is the strong poison, then the player will merely need two more traps with spears to kill the dinosaur outright. If neither one, hits for 30,000 damage, then the poison that wasn't used is going to be the strong one, so the player will need all three to kill the dinosaur. When there are only two frog colors, the second barrage will always need only two spears.
The second method is a coin flip, in all reality, and requires the encounter to only have 2 frog colors. The player picks a color, and assumes it is correct, setting up all three traps. If the guess is correct, then they will kill the dinosaur outright on the first try. Otherwise, they will have to gather the other poison spear available to them and try again. The only reason this has the potential to be as efficient as the two-method is the potential for killing the dinosaur on the first attempt.
Spears, Logs, and Vines cannot exist outside of a Big Game Hunter instance, and once no dinosaurs are roaming the arena, the game will refuse to let a player gather more. However, this doesn't mean that they cannot stock up on resources before baiting the pressure plate. In encounters with multiple dinosaurs it is far more difficult to gather resources. As a result, it is very helpful to stock up on resources during your first two encounters in the instance.
Before you start experimenting to find out what frog is most potent, make a point of cutting a bunch of Logs and Vines; try to have about 21 Spears in total. Typically an instance will have around 5 or 6 dinosaurs before they are scared into hiding. This Spear quantity gives you the resources to fire three Spears at dinosaurs 7 times, allowing for a little trial and error to find the proper poison. If you reach the point where you have fewer than 9 Spears ready after making your traps, Fletch a few more. If you get stuck in a three dinosaur encounter the next time, you will not have enough to easily get by if you do not replenish your supply beforehand.
It is worth noting that it is possible to deplete resources within the arena. If you cut a jungle tree long enough, it will stop yielding Logs; the same applies to a cluster of vines.
After that, try to only kill dinosaurs in the arena once you have enough resources to kill two dinosaurs in the next encounter, or more if you have the space. When using the bait box exclusively for your bait this is very easy- pull out three pieces of bait before starting new encounters, and have 4 Logs and 3 Vines ready to go. You only have to have extras for building new traps if the first barrage of Spears doesn't kill the dinosaur or if you get caught after using some of your resources to make traps that the fleeing dinosaur proceeded to smash. In addition, it is worth noting that the bait box functions as a bank deposit box if the player has built that function in their Base Camp. This allows players to put away their drops and thus save space for supplies. Below is a set of inventory samples for an instance in the Arcane apoterrasaur arena where the 30,000 damage frog was the Phantasmal poison frog.

Skinning the Beasties
When a creature is killed, its body remains on the pressure plate until it is skinned. Skinning a dinosaur is when they drop their various Rewards. The process of skinning the creatures is normally not a huge deal, but when you do so in an encounter with multiple dinosaurs it is still important to avoid the notice of any remaining dinosaurs while you skin their brethren. Don't skin a dino with its brother watching, that's just rude.
Skinning a dinosaur takes 6 seconds, and awards both Hunter and Slayer experience based on the tier of the dinosaur being skinned. The amount of experience awarded is broken down in the table below along with their Dinosaur scale yield.
| Dinosaur Skinned | Hunter Experience | Slayer Experience | Dinosaur scales |
| Tier 1 Dinosaurs | |||
| Arcane apoterrasaur | 6,000 | 800 | 50-100 |
| Scimitops | 6,000 | 800 | 50-100 |
| Bagrada rex | 6,000 | 800 | 50-100 |
| Tier 2 Dinosaurs | |||
| Spicati apoterrasaur | 12,000 | 2,050 | 100-150 |
| Asciatops | 12,000 | 2,050 | 100-150 |
| Corbicula rex | 12,000 | 2,050 | 100-150 |
| Tier 3 Dinosaurs | |||
| Oculi apoterrasaur | 21,000 | 3,800 | 100-250 |
| Malletops | 21,000 | 3,800 | 100-250 |
| Pavosaurus rex | 21,000 | 3,800 | 100-250 |
After the arena is empty of dinosaurs, you can start another encounter by using the "quick start" option on the bait pad. The instance itself does not end until the dinosaurs go into hiding (see below), or you choose to leave the instance. Leaving the instance can be done by teleporting out, selecting the leaving option on the bait pad, or physically leaving the bounds of the arena.
Scaring Beasts Into Hiding
Similar to the relationship between players and the different clan in Prifddinas, different dinosaurs can only be hunted for so long before they will go into hiding. Until they come out of hiding (1 hour), any attempts to begin an encounter with the hiding creature will be met with the message "The herd of creatures is currently in hiding. Come back later."
There are two ways that Big Game creatures can be scared into hiding. As mentioned in the Starting an Encounter section, you can only hunt one breed of dinosaur at a time. If you hunt one type and then decide to hunt another, you must shoo the previous creature into hiding.
The other one is a bit more common. By continually hunting the same species over and over, you eventually scare them into a state of paranoia. At that point, they are sure that they must hide in order to not got extinct. How many times you must hunt them before they reach this point is not constant- it varies from around 3 to 10 successful hunts.
Rewards
When a dinosaur is skinned, they will always drop 3-5 Dinosaur bones, a Dinosaur hide (or Damaged dinosaur hide), some Dinosaur scales, and 1-2 pieces of their meat in its raw form.
Successfully killing and skinning a dinosaur also awards hunter marks, a currency unique to Irwinsson's hunter mark shop in the Anachronia Base Camp. All dinosaur kills earn 1 hunter mark.
It is also worth noting that the rewards for successfully skinning a dinosaur get increased for when you skin multiple creatures in the same encounter. The first dinosaur in an encounter will always yield the usual drops and experience. The second dinosaur you skin (in two or three dinosaur encounters) will yield double experience and drops, and the third (in three dinosaur encounters) will yield triple experience and drops. As such, you can expect a successful two dinosaur encounter to yield the experience and drops of 3 single dinosaur encounters, and a successful three dinosaur encounter to yield a whopping six times the experience and drops of a single dinosaur encounter. Like the drops, hunters marks are doubled and tripled depending on the number of dinosaurs, meaning a successful 2 dinosaur encounter will yield 3 hunter marks and a successful 3 dinosaur encounter will yield 6 hunter marks.
In addition to these guaranteed drops, each dinosaur has a number of unique drops and some items they all have a chance of dropping. The drops unique to this Hunter/Slayer training method are shown in the table below.
| Item | Image | Dropped By | Use/Function |
| Compacted hides |  |
All dinosaurs | Sent to the Anachronia Base Camp as building supplies |
| Dinosaur rib bone |  |
All dinosaurs | Used in the Anachronia Base Camp to build the Tier 3 Player's Lodge |
| Dragon Mattock |  |
All dinosaurs | Used in Archaeology to help excavate; Required to make Crystal and Imcando mattocks. |
| Reinforced dinosaur pelt |  |
All dinosaurs | Used in the Anachronia Base Camp to build the Tier 3 Hunter Lodge |
| Superior long bone |  |
Pavosaurus rex* | Used to construct a Terrasaur maul |
| Totem of summoning base |  |
All dinosaurs | Used to construct the Totem of summoning |
| Totem of the abyss middle |  |
All dinosaurs | Used to construct the Totem of the abyss |
| Tribal fin |  |
Oculi apoterrasaur* | Used to construct a Terrasaur maul |
| Volcanic fragments |  |
Malletops* | Used to construct a Terrasaur maul |
*The drop rate of these items increases significantly in encounters with multiple dinosaurs rather than being doubled or tripled. This increased drop rate only applies to the final dinosaur in the encounter.
Happy hunting and may your drops be favorable!
This Special Report was written by Zandahar and 3ter 1. Thanks to Zandahar, Fuzzyjoe162, and 3ter 1 for corrections.
This Special Report was entered into the database on Sun, Jul 28, 2019, at 04:52:25 PM by Chath, and it was last updated on Sun, Jun 02, 2024, at 11:17:29 PM by 3ter1.
If anything is incorrect or missing, or if you have any new information to submit to this database, please submit it to us on our Content Submissions Forums.
If you see this guide on any other site, please report it to us so we can take legal action against anyone found stealing our content. This guide is copyrighted by RuneHQ, and its use on other sites is expressly forbidden. Do not ask if you can use our guides or images, the answer is and always will be NO!
Print this page with images - Back to the Special Report Index Page - Back to Top


