
| Imperial district teleport | Pollnivneach teleport | Ring of slaying / Slayer cape | Sophanem slayer dungeon teleport |
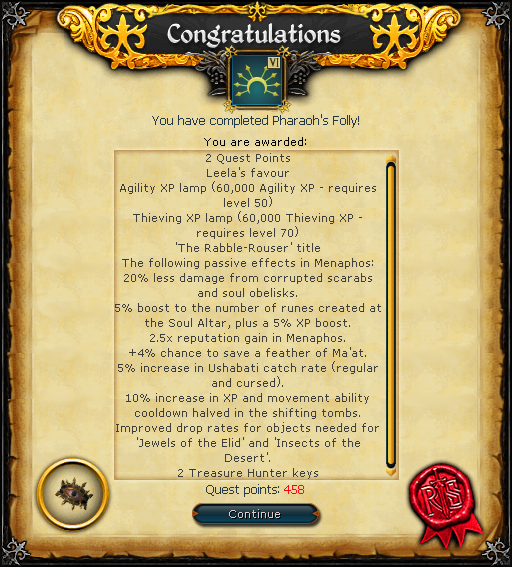
- 20% less damage from corrupted scarabs and soul obelisks
- 5% boost to the number of runes created at the Soul Altar, plus a 5% XP boost
- 2.5x Reputation gain in Menaphos
- +4% chance to save a Feather of Ma'at
- 5% increase in Ushabti catch rate (regular and cursed)
- 10% increase in XP and movement ability cooldown halved in the Shifting Tombs (this stacks additively with the Mobile perk/Shadow's Grace relic)
- Improved drop rates for objects needed for Jewels of the Elid and Insects of the Desert
-
Talk to Leela and she will tell you that she hasn't reported to the Pharaoh about your fiasco with Scabaras yet because she can't bring herself to and doesn't know what to do next. Accept the quest when prompted. You can ask why she's worried if you want to know more or simply say that you need to get it over with (chat option 2) to continue.
Note: Before proceeding to the next step, lower level players should consider having the basic Prayer book active to extend the time they have to complete the next few steps. Additionally, any resources to increase your maximum lifepoints (Thermal bath (Oo'glog or Anachronia) and bonfire boost at War's Retreat), Shadow's Grace relic (for "Mobile Perk"), and Infernal Puzzle Box on your toolbelt (sustain Adrenaline outside of combat - for Regenerate or Rejuvenate abilities) are encouraged.
-
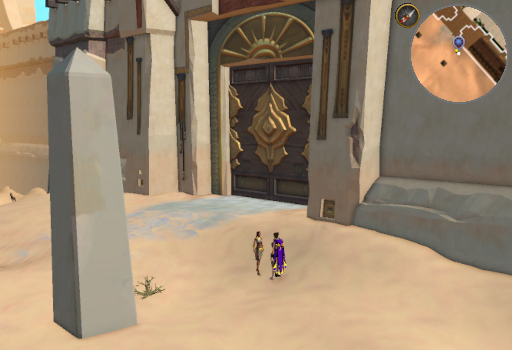
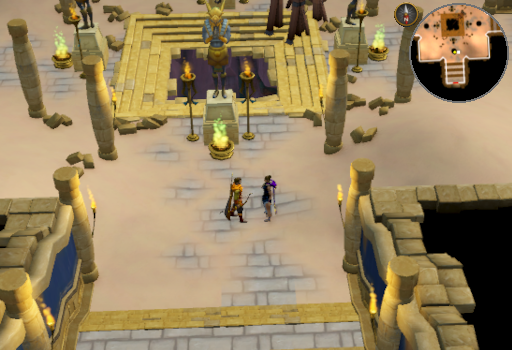
Make sure you have no follower, no items equipped, and an empty inventory then proceed to the palace - you will not be allowed to enter if you have not prepared accordingly. Continue the quest when prompted, talk to Osman, and pick any of the chat options you are given. Regardless of your choice, arguing will ensue. Osman will try to cover his plot to kill the god to prevent Amascut from claiming Scabaras' power by confining Leela to the palace and imprisoning you (foolishly) in the Shifting Tombs.
Note: The fastest way to reach the palace is by using an Imperial district teleport or teleporting to the Menaphos lodestone.
-
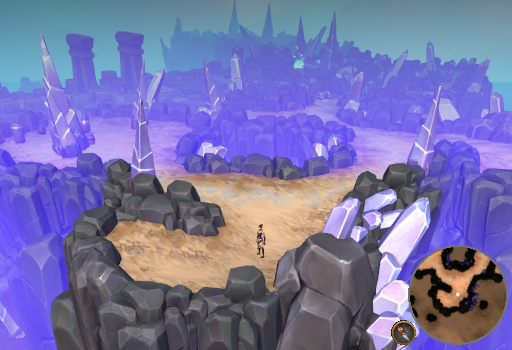
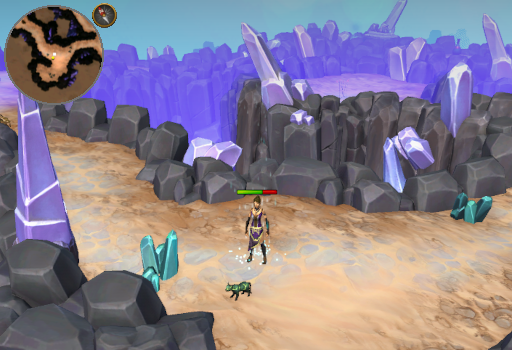
The layout of the tomb is different for every player every time they enter. While you are in the tombs you will slowly acquire stacks of corruption, which cap at 14. Every few seconds you will take 10 damage per stack of corruption. Higher level players can mostly ignore this damage for a long time, but lower level players should use the Rapid Heal prayer (or better yet, Rapid Renewal) to increase how long they can spend in there. Explore until you find the exit rope, but be sure to do the following things along the way:
- Break any urns you pass by until one of them drops a Gut string
- Open any chests you pass by until one of them drops some Feathers (Pharaoh's Folly)
- Mine any crystaline corruption you pass until one of them drops some Crystal shards (Pharaoh's Folly)
- Unlock any Sarcophagi you pass by until one of them drops some Mouldy bandages
Note that you can leave and reenter the Tomb at any point in time to continue - reenter the palace and you will be returned to the Tomb. Doing so will generate a whole new map to explore and any items previously found will be lost. The only thing you will not have to repeat is your rope interaction in the next step. That will remain as it was when you left the Tomb.
-
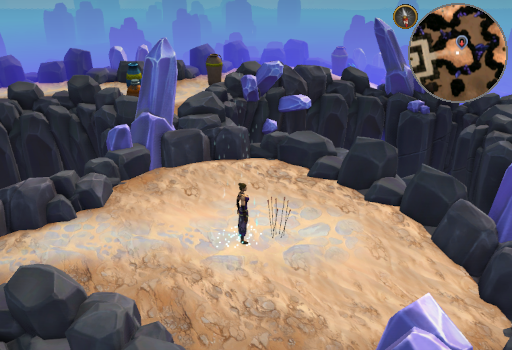
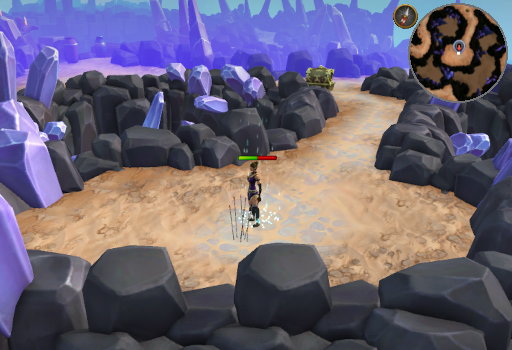
Try to climb the exit rope. It will disintegrate in your hands, but a handful of arrow shafts will be dropped down to you. Search them once to obtain a Mysterious message. Read it to find out that Ozan (alias: the Jack of Spades) will help you get out if you can find a way to get closer to the surface. Search the arrow shafts again to obtain a Spare arrow shaft.
-
Continue exploring the area while checking for any remaining items from step 3. As you progress, you will encounter a cat. Talk to it and they will tell you (yes, this works without the Catspeak amulet!) that Amascut can't be destroyed. The cats tried to destroy Amascut and failed. To hear their story, you need to locate all 4 cats in the Shifting Tombs: Takhuit, Bestopet, Katatrina, and Shebit. The order doesn't matter, but when the last one finishes telling you their story you will be given a Curved bone (Pharaoh's Folly).
-
Return to where the exit rope was and start making your own escape. Use the Curved bone (Pharaoh's Folly) on the Gut string to make a Fragile bow. Next, use the Feathers (Pharaoh's Folly) on the Spare arrow shaft to make a Feathered spare arrow shaft and use the Crystal shards (Pharaoh's Folly) on that to make a Scrappy arrow. Finally, stand near the arrow shafts and use the "Fire arrow" option on the Fragile bow to turn the Mouldy bandages into a replacement rope and climb up.
Note: you can technically make the Fragile bow anywhere within Shifting Tombs, but you must be within at least 3 paces of the arrow shafts to fire it
-
Talk to Ozan and you will learn that Commander Akhomet isn't fully on board with Osman's actions at the moment, so you might be able to sway her. She is currently outside the walls of Sophanem to clear her head.
-
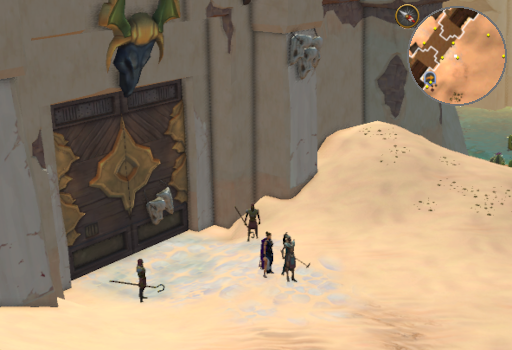
Head to the Norther gates of Sophanem and talk to Commander Akhomet outside the city walls. After telling her what happened at the Temple of Isolation, she will be angered that his manipulation cost her the life of one of her best men. She will tell you that Leela's under house arrest, but spending most of her time in the palace library. When she mentions how the previous Pharaoh was killed you can choose any response to continue. Despite this, she will offer her aid in doing something about Osman: she will gather the council if you gather witnesses so that they can publicly name a new successor for the throne. You will also be tasked with rescuing Leela.
Note: Despite the intel you got from Ozan, Commander Akhomet can be found in her usual spot within the Imperial district. Talking to her there won't yield any progress. She'll tell you to meet her where Ozan said she was.
-
You will need to gather 4 people to serve as witnesses. Use the table below to find them. Talk to each of them and continue the quest when prompted.
Witness Map Location Travel Recommendation Emir Ali Mirza
He will agree to send an emissary on his behalf.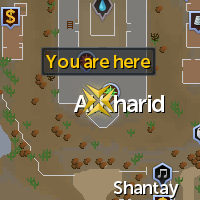
Al Kharid
in the palace throne roomAl Kharid Lodestone Grand Vizier Hassan 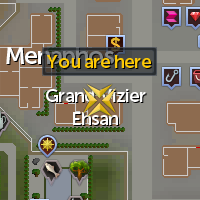
Menaphos
in the house of Grand Vizier EhsanPass through the Shifting Tombs to the Merchant district Lydia 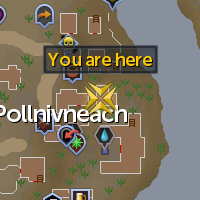
Pollnivneach
in the house North of the fountain and South East of SumonaSlayer cape or Ring of slaying to Sumona or a Pollnivneach Teleport Maisa 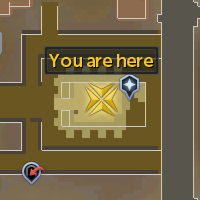
Sophanem
in the temple directly across the bridge from MenaphosSophanem Slayer Dungeon teleport
-
Return to Ozan at the entrance to the Shifting Tombs. Talk to him and continue the quest when prompted. Your next task will be rescuing Leela. Exit the Shifting Tombs area through the West passage and continue the quest when prompted. If you abort the rescue mission at any point, this is where you will have to go continue from where you left off.
-
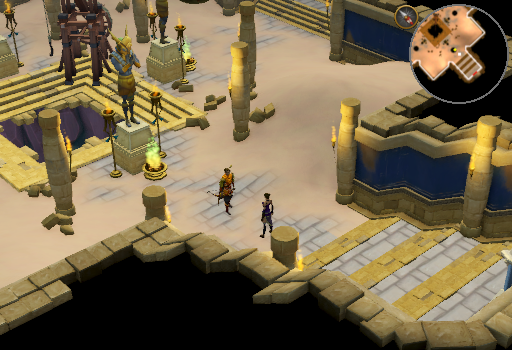
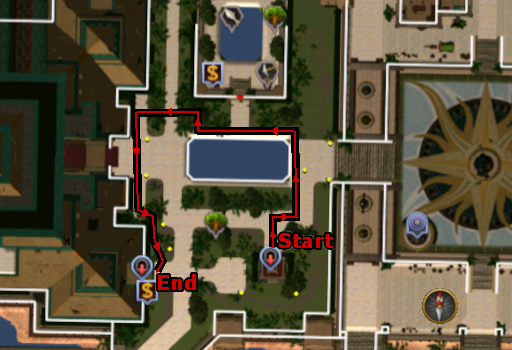
Time for a stealth mission! While doing this task, you will not be able to use movement abilities (surge, escape, dive, bladed dive, barge, and greater barge) nor will you be able to run. For the first area, we will be traveling from the entrance of Shifting Tombs in the Imperial District to the Great Library. But, since we obviously don't want to be seen, we cannot take a direct route.
- Wait until the guard patrolling around the pool is going West, then sneak North around the East side of the pool
- Continue West around the pool until you have passed the 2 guards in front of the VIP area
- Go North West to avoid being seen by the guards directly in front of the palace
- Walk behind the guards in front of the palace and wait until the guard patrolling the pool turns to go East
- When they do, continue sneaking behind the guard at the corner of the walkway
- Wait for the guard patrolling in front of the library door to be facing East or South then sneak up to the library door and go through
-
Talk to Ozan and you will come up with a plan - this acts as a checkpoint in the quest. Ozan will approach the guards from the North and distract them while you make your way to Leela from the uppermost Southern staircase. Before you leave, Ozan will give you a Signal torch.
-
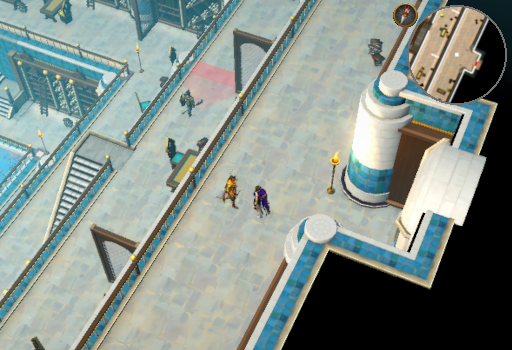
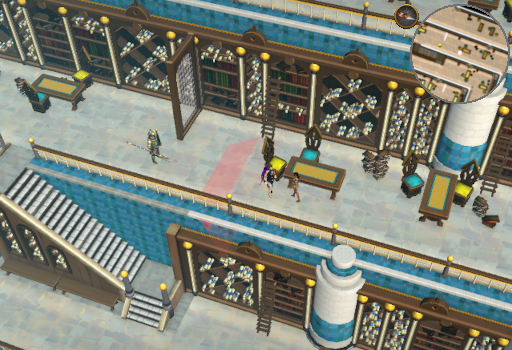
Sneak around the South East corner, but no further than the space between the ladder and the stacks of books. Wait for the guard patrolling the Southern walkway to approach you. As soon as they turn West again, start walking West towards the staircase. Go down the stairs and stand on the bottom landing. Once here, use the Signal torch. Ozan will start doing his thing and the librarian will order the guards to arrest him... quietly... Completing this step functions as a checkpoint if you leave and return.
-
When the cutscene ends, walk West and talk to Leela. She'll start following you. Completing this step functions as a checkpoint if you leave and return.
Note: If Leela gets separated from you by walls or other parts of the terrain, don't panic. She won't alert the guards, only you will.

-
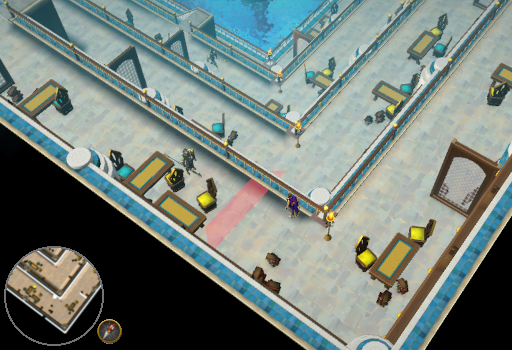
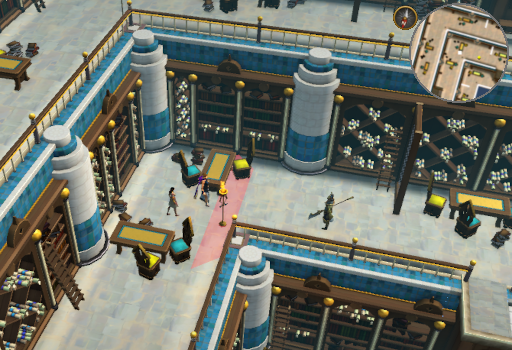
As per the plan, you now need to meet Ozan at the Sundial in the center, so that's your next destination. Sneak East and turn the corner Northwards. Pass the first table, then stand next to the yellow chair by the second table you pass. Wait until the guard turns North, then immediately start walking to the staircase North of you and go down to the bottom landing.
-
On this floor, turn South and stand in the corner. Position yourself directly North of the table closest to the corner. Wait until the guard turns West then immediately start sneaking towards the stairs on that wall. As before go down to the bottom landing.
-
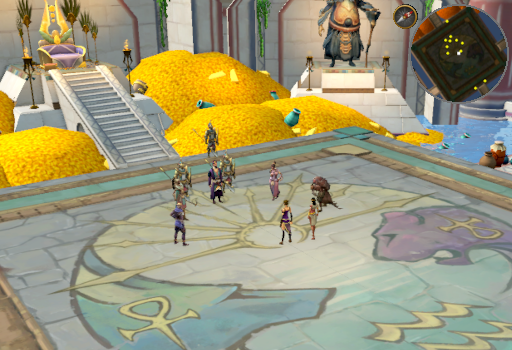
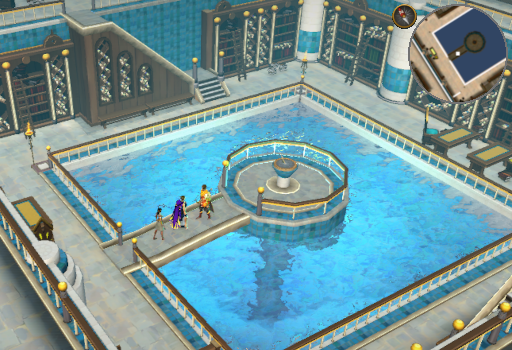
Walk over to Ozan by the sundial and talk to him. He'll tell you that there's a channel that connects this fountain to the river delta. All of you will dive in and escape. You will come out of the water in Sophanem by the Luminious wisps colony. After a long discussion about historic parallels that Leela doesn't like, the group will conclude that it's time for the confrontation.
-
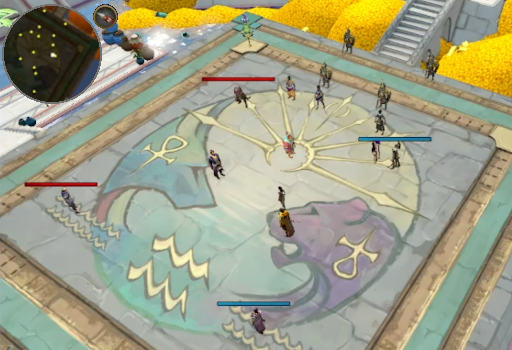
Turn your run back on and make your way back to the Menaphos throne room, choosing to continue the quest when prompted. You will have to talk to each member of the council and ask for a witness to speak about something. Use the table below to guide you. When you have convinced a member of the council to vote against Osman, the bar above their head will change from blue to red.
Note that each council member has 2 witness that can sway them as desired. Choose your preferred witness and ask them about the correct topic as per the table below.
Once all of them are convinced, the trial will end and you will find yourself outside the palace once more.Council Member Option 1 Option 2 Witness Ask About... Witness Ask About... 'Admiral' Wadud Lydia Coenus' death Maisa Agents dying on Osman's watch Batal Maisa Scabaras Grand Vizier Hassan Osman and the library Commander Akhomet Grand Vizier Hassan Osman's strengths Emissary Qar
(on behalf of Emir Ali Mirza)The incident with the Kharid-ib Grand Vizier Ehsan Emissary Qar
(on behalf of Emir Ali Mirza)Emir Ali Maisa Osman's sense of humour
-
Enter the palace again and talk to Pharaoh Leela to finish up and claim your rewards.
Congratulations, Quest Complete!
This Quest Guide was written by Sy Accursed, 3ter 1, ChathMurrpau.
This Quest Guide was entered into the database on Thu, Apr 10, 2025, at 01:03:38 AM by Chath, and it was last updated on Sun, Apr 20, 2025, at 10:50:34 PM by Chath.
If anything is incorrect or missing, or if you have any new information to submit to this database, please submit it to us on our Content Submissions Forums.
If you see this guide on any other site, please report it to us so we can take legal action against anyone found stealing our content. This guide is copyrighted by RuneHQ, and its use on other sites is expressly forbidden. Do not ask if you can use our guides or images, the answer is and always will be NO!
Print this page with images - Back to the Quest Guide Index Page - Back to Top