-
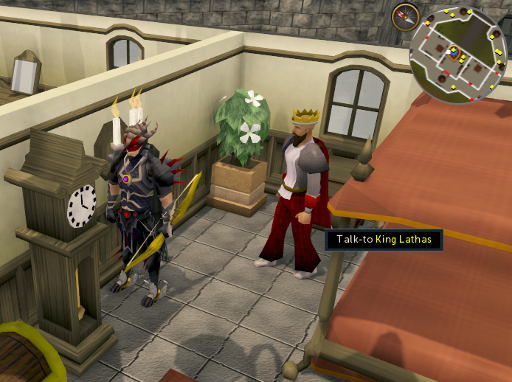
After you have completed the Underground Pass quest, a squire will randomly appear and give you the King's message. The message will say that you should visit King Lathas, on the second floor of the castle in East Ardougne. Head to the castle and King Lathas will tell you that the wizards have finally finished the work on the Well of Voyage. He wants you to go through the Underground Pass, to assassinate his brother Tyras, and to find an easy route back home. The king will then inform you that a group of elves, lead by Lord Iorwerth, are willing to help you out.
Note: The easiest way to reach East Ardougne is by using the Ardougne lodestone or the Ardougne teleport spell (requires 51 Magic).
-
Make your way straight through the Underground Pass to Iban's Temple (Please refer to the Underground Pass quest guide for more information on the path to follow). When you have reached the temple, enter it and climb down the Well of Voyage
Note: You can skip the parts of collecting the orbs, making the doll, and killing the unicorn. Do not talk to the Paladins either as they will see you as an Iban follower and will attack you. If you are in need of extra food, you may talk to Koftik in Iban's Temple and he will give you a random amount of food.

-
You will end up in a cave with an altar and an obelisk. Leave the cave and as soon as you appear in the land of the Elves, a cut scene will occur in which Idris gets killed by two elves named Morvran and Essylt. They will tell you to visit Lord Iorwerth at the
Elf Camp in the northwest corner of the forest.

-
There are some dangerous traps you will encounter on your way through the forest. For the location of each trap, refer to the Tirannwn map.
-
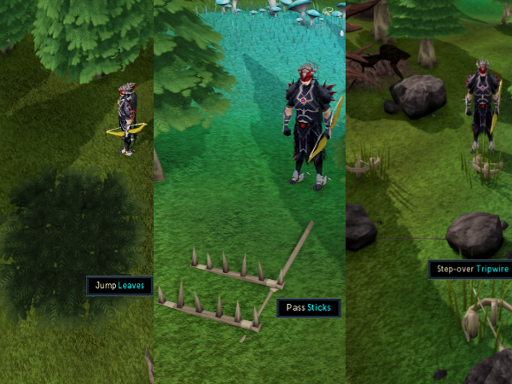
Leaf trap:These traps appear as a circle of leaves on the ground. If you fail to jump over the leaves you will fall into a small pit and take 500-800 damage. Climb up the protruding rocks to get out of the pit and try to bypass the trap again.
-
Stick trap: These traps will deal between 200 and 400 damage if you fail to pass them.
-
Tripwire: These wires are extremely hard to see. If you fail to step over the wire, the surrounding 4 crossbows will shot arrows at you, each dealing between 200 and 400 damage. Please note these can also poison you.
-
Leaf trap:These traps appear as a circle of leaves on the ground. If you fail to jump over the leaves you will fall into a small pit and take 500-800 damage. Climb up the protruding rocks to get out of the pit and try to bypass the trap again.
-
From the area where Idris was killed, follow the path leading South-West into forest past a leaf and a stick trap. When you have made it past these two traps, take the North path leading to the Elf Camp in the North-West part of the forest. Jump over the leaf trap and cross the log balance to access the camp. There, speak to Lord Iorwerth and he will offer you his full support to get rid of Tyras. However, since his troops are currently occupied he will tell you to seek out one of his Trackers. Before leaving the camp, pick up an Empty pot from the ground.

-
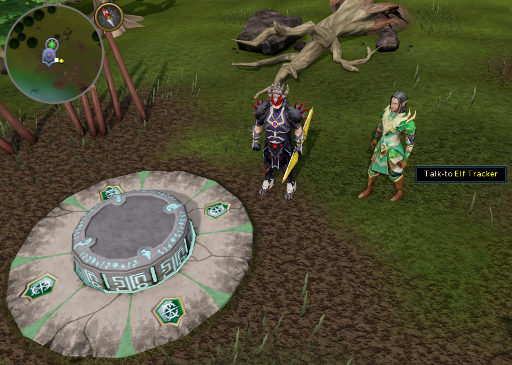
Leave the camp, past the leaf trap, and keeping continuing South until you spot the Elf Tracker. He will think that you are one of Tyras' men and will not trust you. Return to Lord Iorwerth and he will give you his Crystal pendant. Equip the pedant and return to the Elf Tracker, who will now trust you.
Note: Before proceeding to the next step, take the opportunity to activate the nearby lodestone for future use.
-
You will tell Elf Tracker that you need to find and kill Tyras. He admits that he knows the location of his old camp but need help tracking down the new location. The tracker will ask you to search the West side of camp for a trace of Tyras's men. Just to the West, you will see some footprints on the grass. Try to follow those tracks and you will be told that you cannot. Report back to the Elf Tracker and he will tell you what you need to know to pass through the dense forest.

-
Prepare for battle and enter the dense forest. When you have made your way through the dense forest, you will be attacked by a Tyras Guard. It is advised to turn on the Protect from Melee Prayer as there are barely any safespots around to use Magic or
Ranged. After you have killed him, no other Tyras Guard will automatically attack you.

-
Head North-West into the forest, past the tripwires, and through the dense forest until you come to a junction. Take the path leading South and go through another dense forest into the Tyras Camp.
Once inside of the camp, ask General Hining in the center if you can see his king. He will tell you the king sees no one but will stand between us and the end.
Before leaving the camp, pick up two barrels from the ground as you will need them later on.
Note: After having spoken to General Hining, you will unlock the ability to buy halberds from the Quartermaster's general store.

-
Return to Lord Iorwerth and inform him that you have found Tyras' camp. He will reveal his plans of wanting to destroy that camp using the knowledge from the Big book of bangs.
Iorwerth will then ask you to help find a way to get rid of the camp. Read the book to find out that you will need Ground sulphur, a Pot of quicklime, and a Barrel of naphtha to make an explosive.
Head to the swamp South of the Elf Tracker and pick up some sulphur from shores of the swamp. Grind the sulphur to turn it into Ground sulphur. Now, fill one of the Barrels with the tar from the swamp (This can be found along the shores) to get a Barrel of coal-tar.

-
If you forgot to bring Limestone, then travel to the limestone quarry in the North-Eastern corner of the forest, just East of the Southern gate of the city of Prifddinas.
Make your way to Falador (or any other furnace, but the small one in Tyras Camp does not work) and use the Limestone on the furnace to make Quicklime. While you have an Empty pot in your inventory, use the Quicklime with Pestle and mortar to make a Pot of quicklime.
Note: If you are not wearing gloves, you will take 80 damage from using the Limestone on a furnace. If you try to grind the Quicklime without having an Empty pot, you will take 50 damage.
-
With the previous items in your inventory, bring 10 to 20 pieces of Coal and travel to the Chemist's house in the West part of Rimmington. Distill the tar by putting the Barrel of coal-tar in the fractionation still, just outside of the house, and then adding Coal (See instructions below). Your goal is to have both the pressure and heat meters in the green/red areas. Once you have filled the 'total distilled' bar, exit the interface and you will receive a Barrel of naphtha.
Note: The easiest way to reach Rimmington is to travel to Port Sarim by using the Port Sarim lodestone or by chartering a ship at the Tyras Camp. From Port Sarim, head West towards the village of Rimmington.
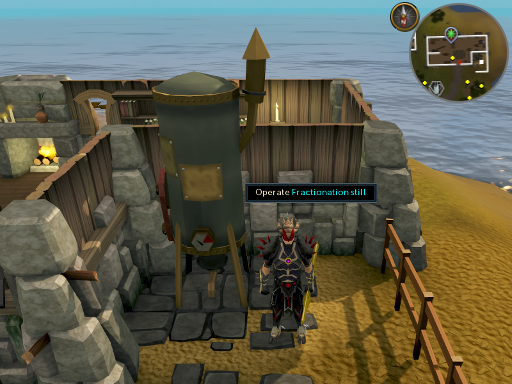
How to Distill:- Use the Barrel of coal-tar with the distiller.
- Left click on the right side of right valve twice, so the tar will flow at maximum. You will see the 'pressure' indicator on the left go up.
- When the indicator reaches the green region, click the right side of the valve on the left to let out pressure. This will raise the indicator on the right.
- If the heat indicator is below the green are, add more Coal. Heat rises fairly slow so be cautious when you add coal or else you will reset the process. If it is in the red area, do not add add coal until it gets lower.
Note: If the heat indicator stays in the red area for too long, the distilling process will reset and you will have to start over by adding another Barrel of coal-tar. If you run out of Coal, the current distilling process will be paused, allowing you to gather more coal without having to start all over.

-
Now use the Pot of quicklime and the Ground sulphur with the Barrel of naphtha to make a Barrel bomb (unfused). Attach the Strip of cloth to the Barrel bomb (unfused) to get the Barrel bomb (fused)
Note: If you don't have a Strip of cloth, you can make one by using 2 Balls of wool on a loom - which can be found just West of the Falador cabbage patch within the farmhouse OR South-West of the Heroes' Guild in Burthorpe.
-
Make your way back through the Isafdar forest towards the catapult, just North of the Tyras Camp, and give the Cooked rabbit to the Tyras guard. While he is distracted, use the Barrel bomb (fused) on the catapult and a cut scene will occur.

-
Report back to Lord Iorwerth and he will give you Iorwerths message, which you must deliver to King Lathas.
On your way to Ardougne Castle, Arianwyn will appear. He will break the magical seal on the message and will let you read it. Arianwyn will then tell you that Lord Iorwerth and King Lathas have been using you for their evil plans but will still ask you to deliver the message to the king.

Deliver Iorwerths message to King Lathas to claim your reward.
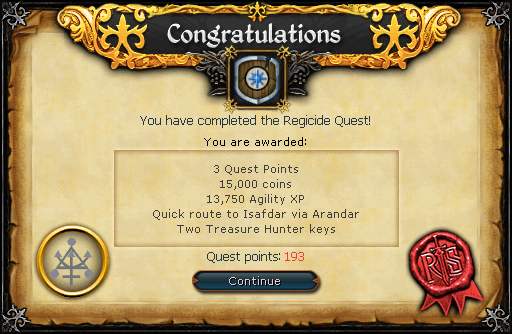
Congratulations! Quest Complete!
This Quest Guide was written by Im4eversmart, Gypped, trekkie, and GeraltRivia2. Thanks to DRAVAN, Lancer, homedog12584, JoshB, ant1989, andro girl, evilishies, Fivestar24, alk12, SchmackyEvil, Koviana, Im4eversmart, Gypped, leontjuh1, EatMyBlade, yozy13, Fleugar, Jonos_Da_Man, Toraq lord12 , Alfawarlord, Mimz, MightYxAjax, Dmblnd229, thehi, Knight9693, Guelphite, samcro_orig, Kwojiba, Gan, cptfalken, and Rooskii. for corrections.
This Quest Guide was entered into the database on Thu, Sep 23, 2004, at 12:18:37 PM by Supercoolyo, and it was last updated on Sun, Jul 21, 2019, at 10:35:34 AM by Alk12.
If anything is incorrect or missing, or if you have any new information to submit to this database, please submit it to us on our Content Submissions Forums.
If you see this guide on any other site, please report it to us so we can take legal action against anyone found stealing our content. This guide is copyrighted by RuneHQ, and its use on other sites is expressly forbidden. Do not ask if you can use our guides or images, the answer is and always will be NO!
Print this page with images - Back to the Quest Guide Index Page - Back to Top
