

| Wilderness sword (1, 2, 3, or 4) | OR Slayer cape | Archaeology Journal |
| 28 Argonlike ore | 28 Argonlike bars | Argonlike battleaxe | Argonlike kiteshield | ||||
| Argonlike pickaxe | 2 Argonlike boots | 2 Argonlike gauntlets | 2 Argonlike full helms | ||||
| Argonlike chainbody | Argonlike platebody | Argonlike plateskirt | Argonlike platelegs | ||||
| Rune pouch (Succession) | One measly fire rune | Empty rune pouch | Inert fire rune fragments | ||||
| Volatile fire rune fragments | Pouch of white dust | Soggy pouch of grey paste |
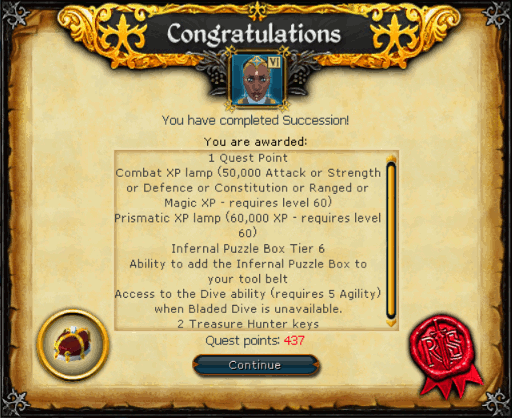
- Combat XP Lamp (Requires level 60 in combat skill, 50k experience)
- Prismatic XP Lamp (Requires level 60 in skill, 60k experience)
- Infernal Puzzle Box Tier 6
- Ability to add the Infernal Puzzle Box to your toolbelt
- Access to Dive when Bladed Dive isn't available (Requires level 5 Agility)
- 2 Treasure Hunter keys
-
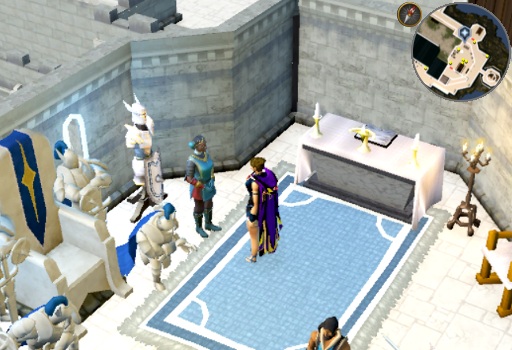
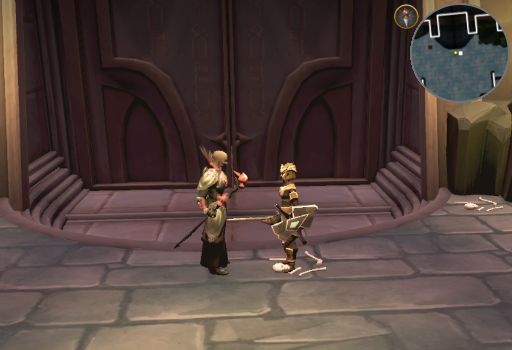
Talk to Adrasteia and she will ask for your help, prompting the quest overview screen. Accept the quest and she will tell you about the concerns she has about Bilrach prior to her succession ceremony. Some of Bilrach's agents were spotted sneaking into the Senntisten prisons. She would like to go with you to stand directly against them before she is crowned. Agree that you are ready to go, then say "Let's continue our journey."
-
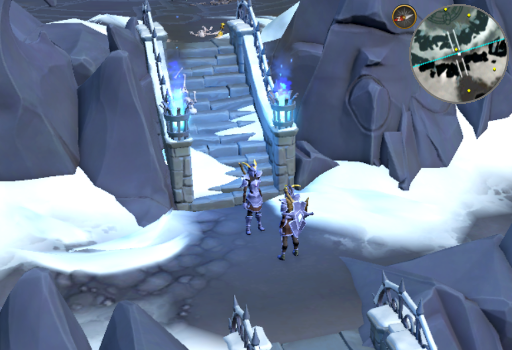
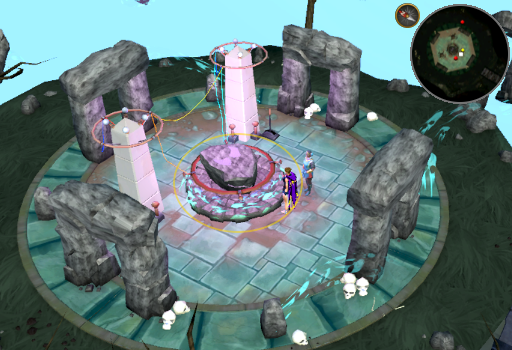
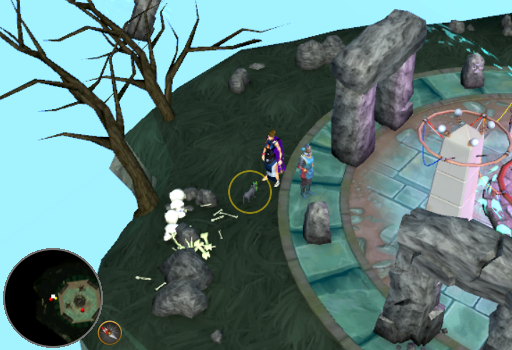
Make your way to the entrance to Senntisten. Adrasteia will follow you there even if you teleport. Enter the ancient doors and continue the quest when prompted.
Note: The fastest ways to get to the entrance are with the Digsite pendant and the Archaeology journal.
-
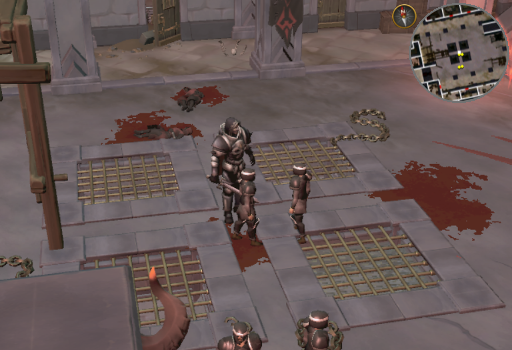
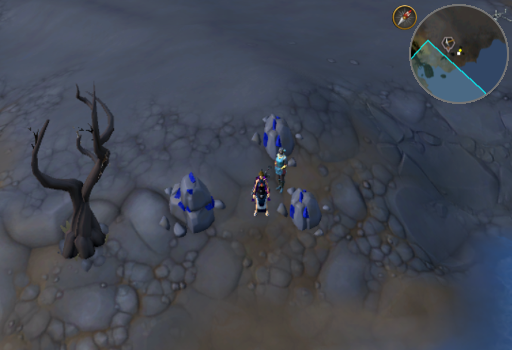
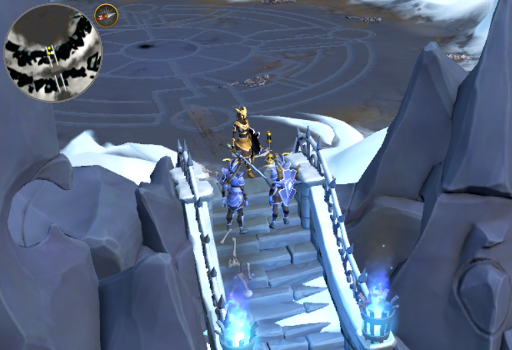
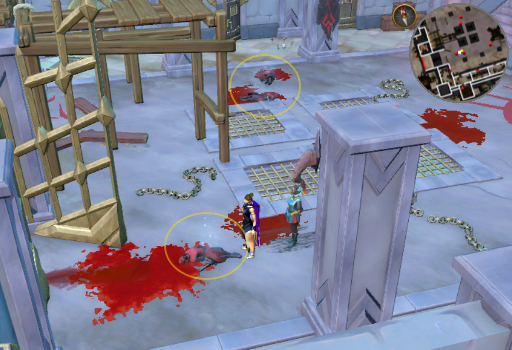
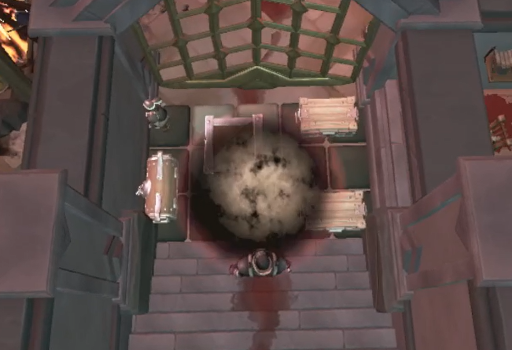
You will find yourself in the prison of the Zamorakian Undercity. While there, you must discover 5 different clues. Each one is highlighted by some blue glowing particles and represented by a red dot on the minimap. While they can be discovered in any order, we recommend this order for the simplest path.
- Discover the Large footprint in the passage where you first arrive in the Undercity.
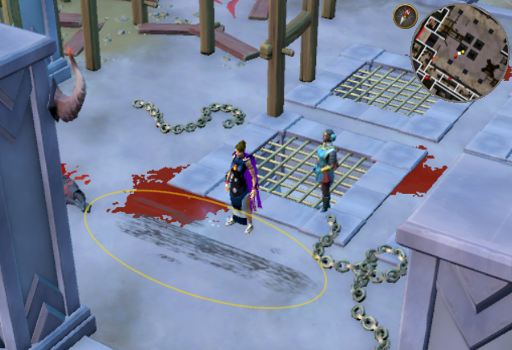
- Follow the passage up the stairs and the ladder, then discover any of the bodies of dead cultists in the central chamber.
- Discover the Ancient Zarosian architecture just South of the large stairway.
- Directly West of the architecture, discover the scratch marks on the floor. They are just South of the prison bars in the center of the room.
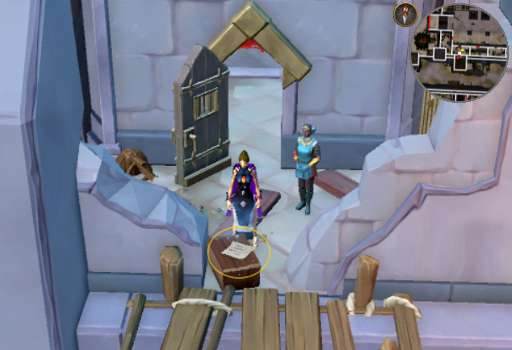
- Go into the South Westernmost room and discover the note from a worker.
-
Adrasteia will surmise from all the clues that General Khazard was here with some soldiers. You will then be forced to reenact what the General did. Talk to one of the Khazard soldiers and General Khazard will tell them to hurry up and find "the artefact."
-
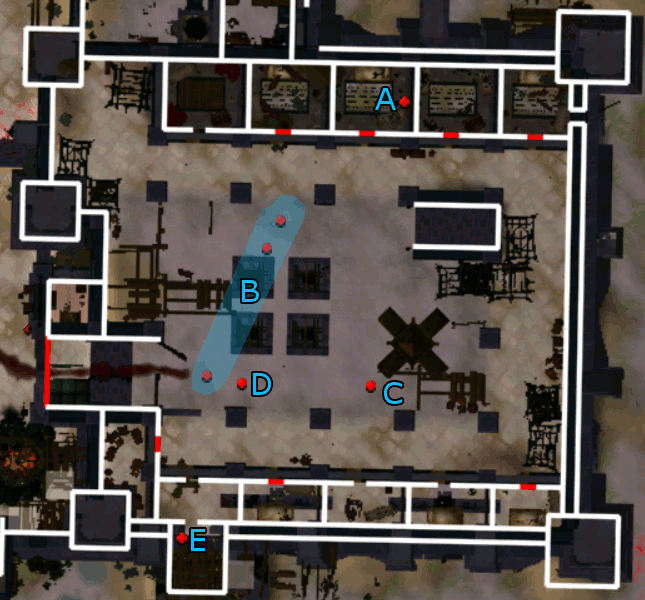
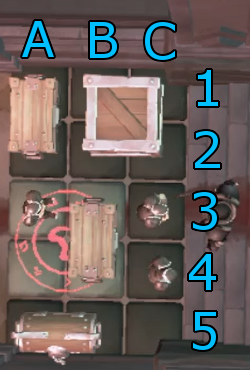
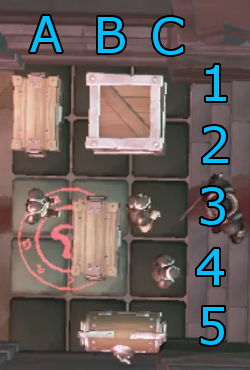
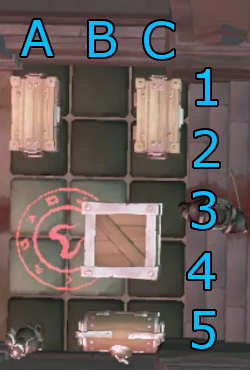
When the scene continues, you will be stuck in a puzzle where you must play "Parking" using the crates and some of your soldiers. It's incredibly stupid, because there's no logistical reason why you couldn't just have the soldiers carry the unnecessary crates out, but it is what it is.
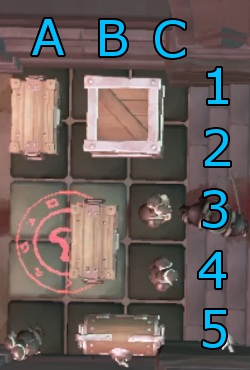
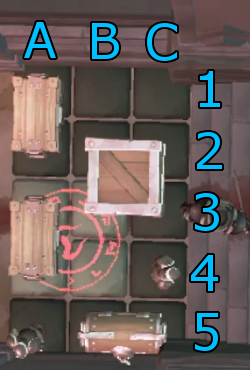
The puzzle functions like a slider puzzle with 2 empty squares, but with a minor twist - the Largest crate, when blocked by the soldiers, will crush them and remove them from the puzzle entirely. Left click the boxes/soldiers and they will automatically move if there is only one direction to go. Should they have 2 direction options, you will be provided with green arrows used to select the direction. Right clicking any of the objects in the puzzle will enable you to reset it at any time. Use the diagram and the steps below to complete the puzzle.
Note that clicking the bold text in the steps below will show you what the result of the move will look like.
- Move the chest on A5-B5 to B5-C5.
- Move the soldier on A3 to A5.
- Move the chest on B3-B4 to A3-A4.
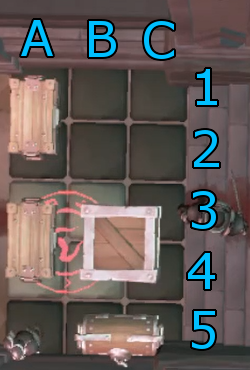
- Move the largest crate from B1-C2 to B2-C3. You will be asked if you want to crush the adjacent guard. You can pick either option, because apparently with General Khazard the only option is violence.
- Move the largest crate from B2-C3 to B3-C4. You will be asked if you want to crush the adjacent guard. You can pick either option.
- Move the chest on A1-A2 to C1-C2.
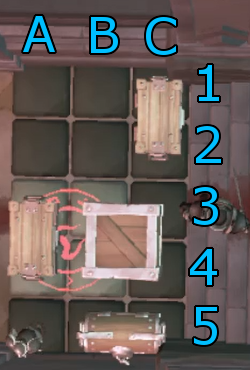
- Move the chest from A3-A4 to A1-A2.
- Move the largest crate from B3-C4 to A3-C4.
-
Like with step 2, Adrasteia will follow you no matter how you travel. Make your way to the Menaphos Grand Library with whatever method you prefer and enter it, continuing the quest when prompted.
Note: the fastest way to reach the Menaphos grand library is by using an Imperial district teleport tab (which can be stored in the Menaphos journal).
-
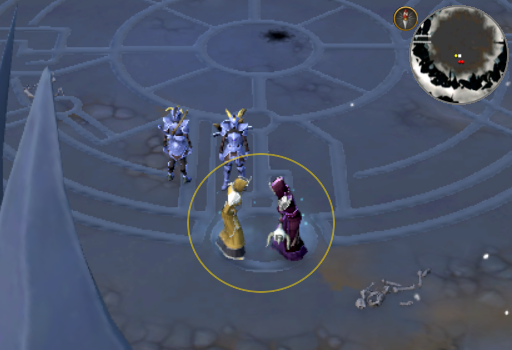
Talk to Adrasteia just South of where you entered. The clues will not appear until you talk to her!
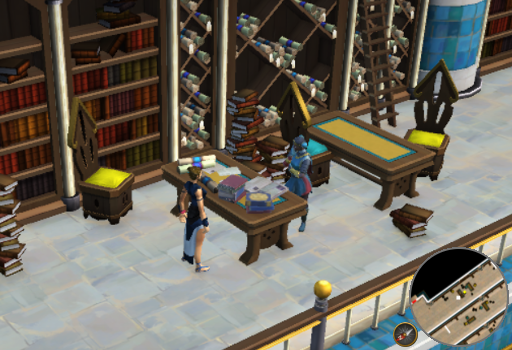
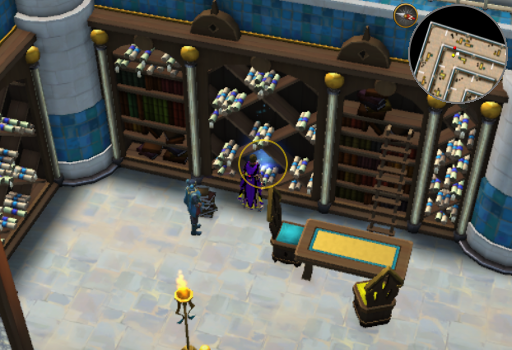
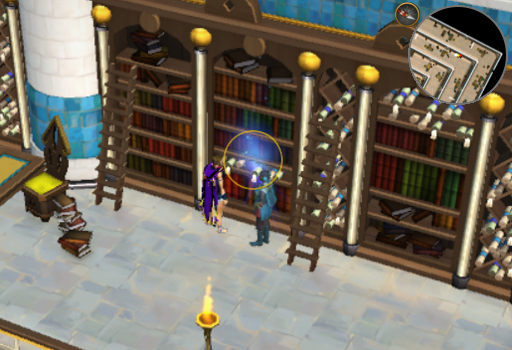
Like in the Zamorakian Undercity, you will now have to discover some clues. For each location in Menaphos there will be 3 clues. Again, they will be highlighted by some blue glowing particles and represented by a red dot on the minimap. Here are the ones for the library:
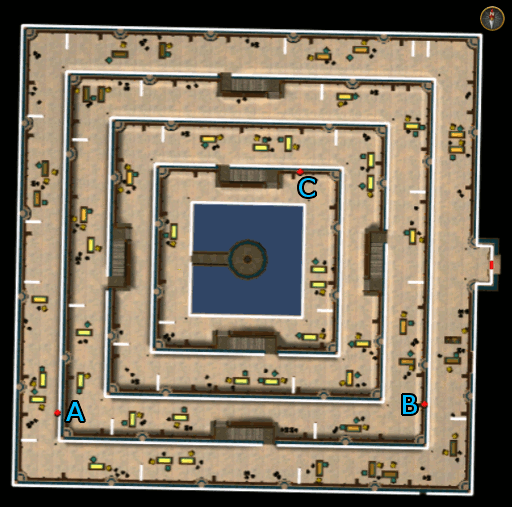
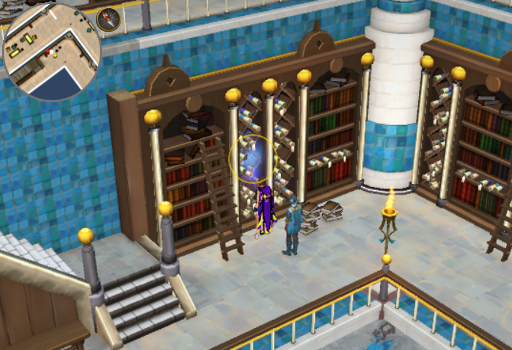
- On the floor directly below the top floor, on the West Wall near the South corner, discover a book about the Teragardian Magister called "The Secret Chamber".
- On the floor directly below the top floor, on the East Wall near the South corner, discover a book on Amascut and her corruption called "The Corruption".
- On the bottom floor's North wall, discover a book on necromancy called "The Living Dead" .
-
Once you have discovered all the clues in the library, you will automatically begin talking to Adrasteia. This will give options to visit the Magister's Chamber and the Soul Altar. You can do them in any order, but we will cover the Magister's Chamber first. Choose to go there and you will have 3 more clues to find.
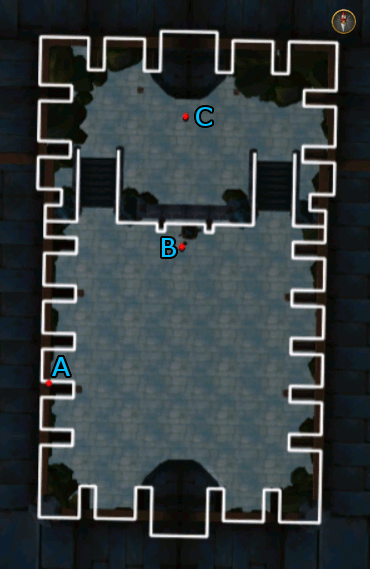
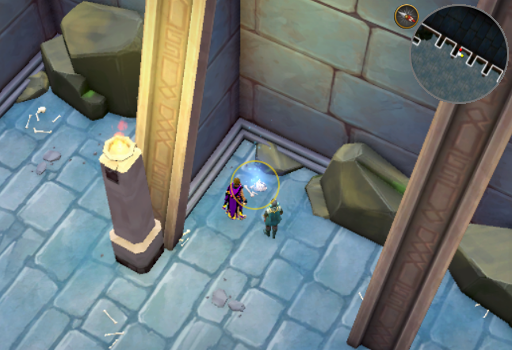
- Discover the Imbued bones on the West wall.
- Discover the Fragments of an obelisk at the base of the Soul obelisk to the North.
- Touch the Soul obelisk to lower the purple barriers, then climb the stairs and discover the Magical residue.
-
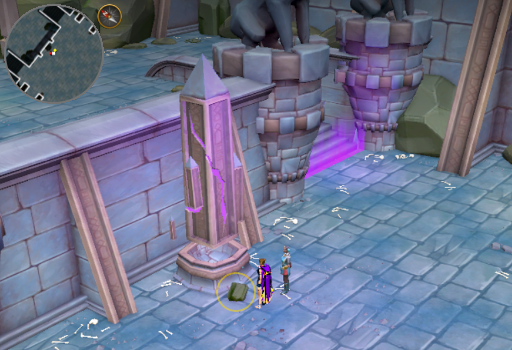
Once at the Soul altar, you will need to find the final 3 clues for Menaphos.
- Discover the scorch marks on the West side of the bottom of the stairs.
- Discover the Soul altar (because you totally haven't seen it before) to find some claw marks on it.
- Talk to Ka, the cat that is roaming around the room.
-
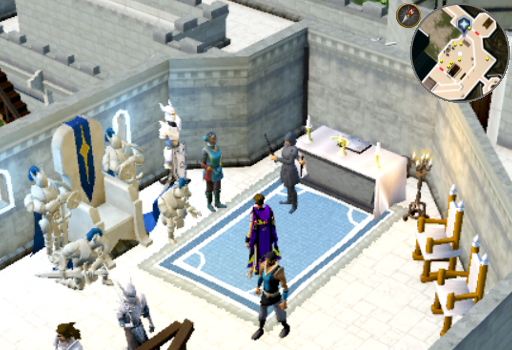
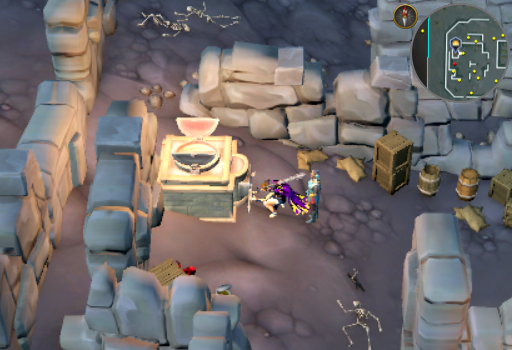
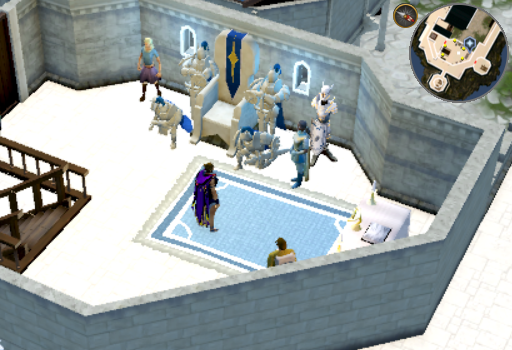
You will start by reenacting Vengeance (from the Dungeoneering Saga) in the Magister's chamber. Walk North and talk to The Magister. He will refuse to give you the information you want. Attack him. This fight isn't very interesting, but it can be a bit close if you don't handle it right. The easiest way to ensure victory is to use all your abilities that stun the target whenever they are off cooldown. Once he reaches 0 hitpoints, he will kneel. Talk to him again and he will agree to give you what information you seek.
Note: Dying here is a safe death, and if you die twice, you will be given the option to skip it.
-
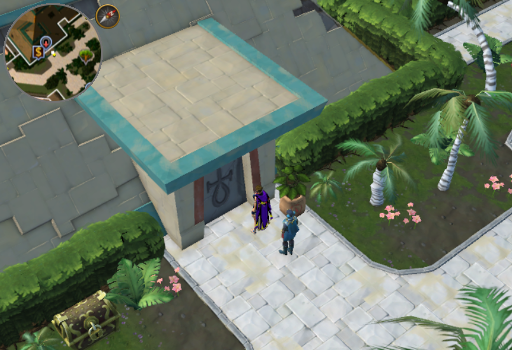
Returning to Gielinor, Adrasteia will say she doesn't like that they were researching necromancy and soul magic. When the dialog ends, you will find yourself outside the gates of Menaphos. She will tell you that you should return to Falador. Tell her "Let's continue our journey," and make your way to Falador through your preferred means. We recommend grabbing your Wilderness sword (1, 2, 3, or 4) if you have one before the next step.
-
Enter the Falador castle throne room and talk to Anne Dimitri. She will tell you that there are soldiers geared in Daemonheim equipment gathering at the Wilderness Mage Arena. Luckily, Daemonheim gear is good for disguising oneself and Anne Dimitri has seen some of its ore come to the surface in the Wilderness recently. Agree that you are ready to go.
-
To reach your destination, we recommend teleporting to the Fort Forinthry lodestone. From there, walk North through the Fort and exit the gate. Once outside, head East a short distance toward the Mining icon on the minimap near the coast. Mine 28 Argonlike ore. When Adrasteia talks to you again, tell her "Let's continue our journey."
-
Make your way to the ruins North of the Graveyard of Shadows. You cannot make the armor anywhere outside the Wilderness, so you will be forced to make the bars at the furnace in those ruins. Be careful, the Gargoyles there are aggressive. Once you have successfully made your 28 Argonlike bars, Adrasteia will talk to you again. Tell her "Let's continue our journey."
-
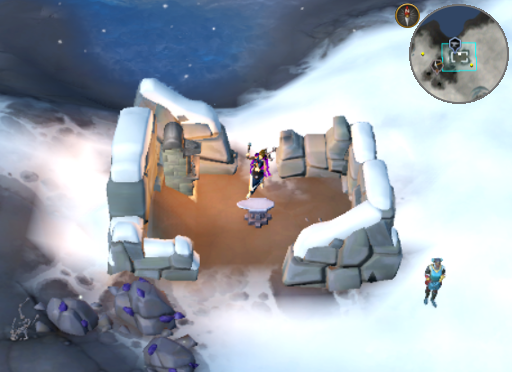
As you must still remain in the Wilderness to create the armour, you have to make it at the Anvil close to Mandrith in the deep Wilderness. Head there and smith and the anvil. After a brief discussion with Adrasteia , you will begin to smith the items automatically: Argonlike battleaxe, Argonlike kiteshield, Argonlike pickaxe, 2 Argonlike boots, 2 Argonlike gauntlets, 2 Argonlike full helms, Argonlike chainbody, Argonlike platebody, Argonlike plateskirt, and Argonlike platelegs. While you are smithing, she will wait at the South East corner of the building.
Note: If you have a Slayer cape, using it to teleport to Mandrith is the fastest method. If you have a Wilderness sword 4, the fastest method of travel is to use the sword to teleport to the Agility course and Run East past the Pirates' Hideout. Otherwise, we recommend teleporting out of the Wilderness, and going to Edgeville to use the lever there. If that is your method of travel, then after pulling the lever, run North, slash the web (which may take a few tries), and run West past the Mage arena to the anvil.
-
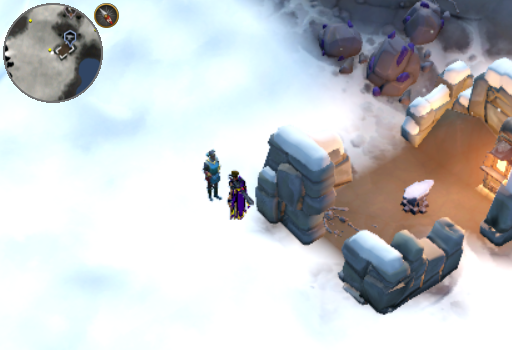
Once the items have all been completed, step outside of the building and talk to Adrasteia to give her a set of armor. She will run ahead to the Mage Arena just East.
-
Equip the remaining Argonlike equipment, then go to the West entrance of the Mage Arena and talk to Adrasteia the Forgotten. If you have anything other than the armor with you at this point, you will be required to deposit them now. Again, Adrasteia will handle this for you. Once you've done that, talk to her again and tell her you're ready to enter the Mage Arena.
-
Talk to Vengeance at the top of the stairs. You will be asked a series of questions to see if you're worthy to be conscripted. Answer the questions like so:
- Q: You stand in a field. The weather is crisp and the grass blows freely. There is a girl in front of you and a sword in your hand.
- A: I wait for orders.
- Q: You have been told to hold a location. It is far from the battle and of little strategic importance. As you stand there, you spot an enemy scout limping away from you, a missive in her hand.
- A: I chase after them.
- Q: Kill your friend.
- A: I refuse.
- Q: You stand in a field. The weather is crisp and the grass blows freely. There is a girl in front of you and a sword in your hand.
-
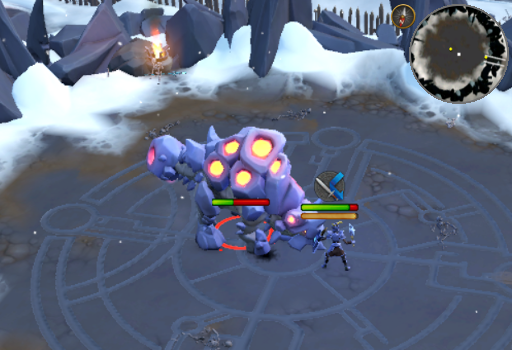
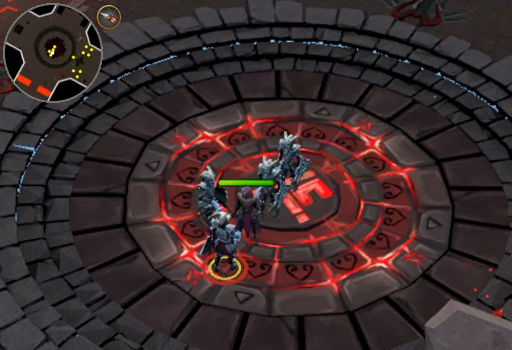
Upon finishing the questions, you will be allowed to prove your combat prowess. You will be placed in combat against a few waves of enemies. This is a safe combat: if you die, you will not lose anything. When you are ready, tell Vengeance to start the first wave. Each time you defeat an enemy, they will drop a health orb. If you collect it, you will regain 25% of your maximum hitpoints. Because you are being forced to use low level gear in this combat, protect from/deflect melee is highly recommended for the last fight.
- Wave 1
- 4 Forgotten mages - 500 hitpoints
- Wave 2
- 2 Seekers - 1000 hitpoints
- 2 Necromacers - 750 hitpoints
- Wave 3
- Mal - 3000 hitpoints
- Wave 1
-
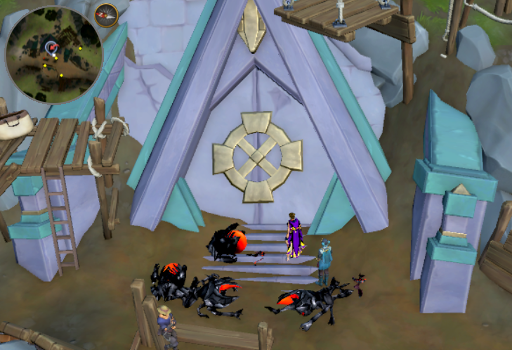
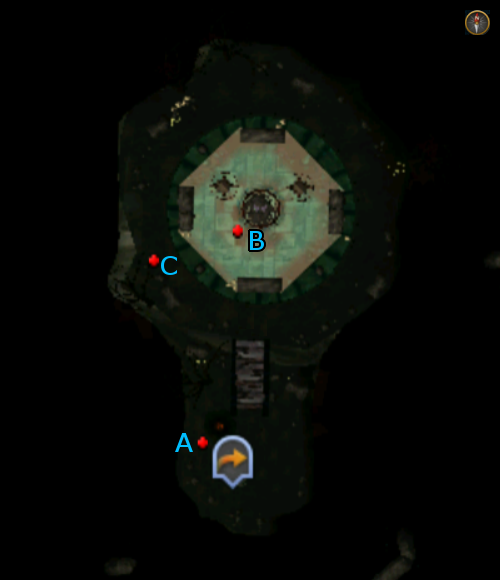
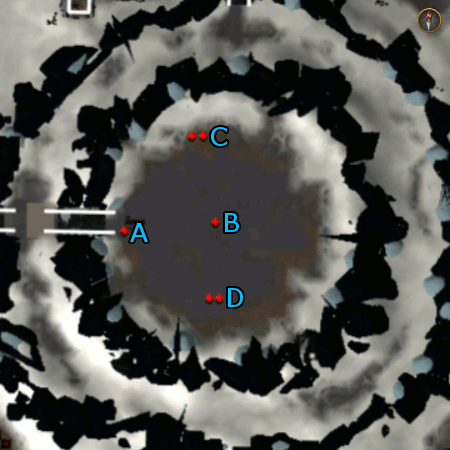
Upon defeating Mal, you will be welcomed into the army and allowed free rein of the area. Talk to Adrasteia the Forgotten and, when the dialog finishes, you will have 4 more clues to find.
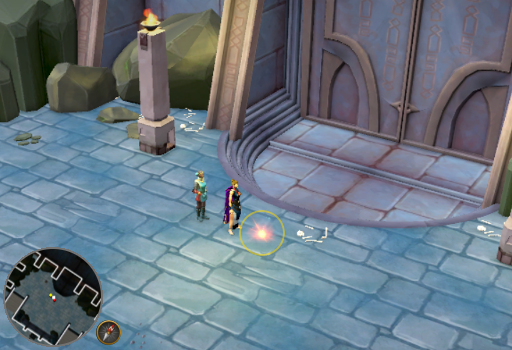
- Discover the scuff marks near the stairway into the arena.
- Discover the scorch mark in the center of the arena.
- Eavesdrop on the Defeated forgotten archer and warrior on the North side of the arena.
- Eavesdrop on the Defeated forgotten mage and necrolord on the South side of the arena.
-
Talk to Kolodion. Bilrach asks him for his secrets of magic absorption. Kolodion will say he expects the kingdom of Asgarnia as payment. Bilrach will refuse to give up territory to him and offer a lesson in pain instead. Adrasteia says he intends to consume half the souls in the human kingdoms. Exit the Mage Arena and search the caves beneath when prompted.
-
Once in the caves, follow the path North and you will quickly find a modified ritual marker. Inspect it and Adrasteia will say you have to find a way to destroy it.

-
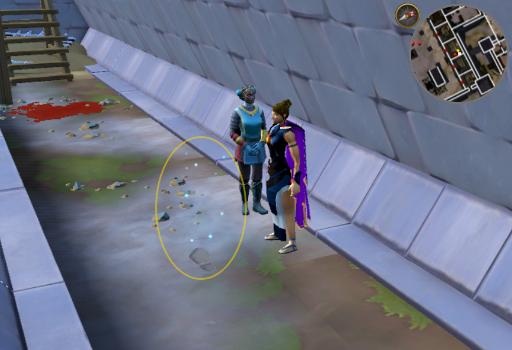
Take the Rune pouch from the South East corner then search it to obtain One measly fire rune.
-
Take the White dust from the North East corner using the Empty Rune pouch to obtain a Pouch of white dust.
-
Use the One measly fire rune on any of the sharp rocks to turn it into Inert fire rune fragments. Talk to Adrasteia and show her the Inert fire rune fragments. She will imbue them into Volatile fire rune fragments.

-
Run to the South end of the cave and use the Pouch of white dust on the pool to get a Soggy pouch of grey paste.
-
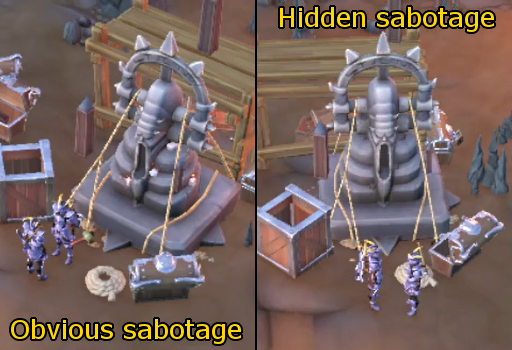
Return to the modified ritual marker and prepare to start sabotaging it! Click on the modified ritual marker and select the Soggy pouch of grey paste then the Volatile fire rune fragments. This will turn the ritual marker into a Blatantly sabotaged ritual marker. Click it again and select the Soggy pouch of grey paste to conceal the sabotaging.
-
Leave the cave via whatever method you prefer, then make your way to the Falador castle throne room and talk to Adrasteia. You will be given a cutscene of the ritual failing and blowing up in the Mahjarrats' faces. When it ends, say whatever you like to Adrasteia and now you get to play party planner. Horray!

-
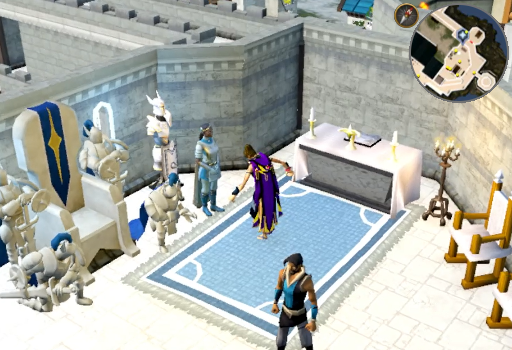
When the dialog ends, talk to Adrasteia again and tell her you have the eating plan. Tell her the ambassadors in the following order: Asgarnian, Kandarin, Menaphite, Misthalinian (1, 3, 4, 2). When she asks you to visit her from time to time, you can promise her if you like, but it doesn't actually matter.
-
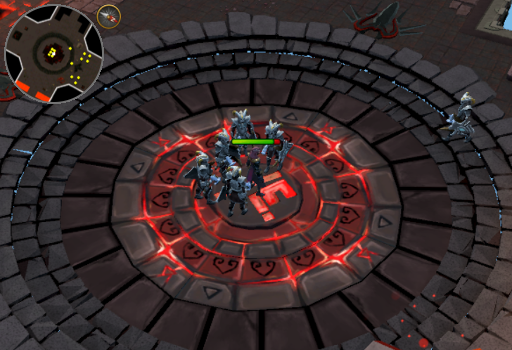
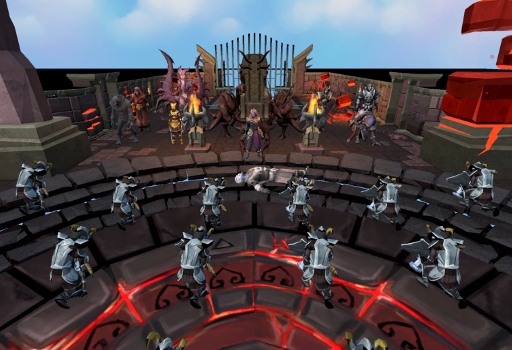
A cutscene will now begin where Adrasteia is crowned Basilissa before addressing her people and singing a song. After she sings a few bars, you will see Moia return to Bilrach and laugh in his face about his failure. Bilrach will order guards to kill her. You will have to control Moia and kill 10 guards to continue. You have the same abilities you did during Daughter of Chaos - found at the top of your screen. Once 10 guards have died, the scene will cut back to Adrasteia's song.
-
After a few more bars, the scene will go back to Moia in Zamorak's Hideout. The confrontation will continue and she will drain some of Zemouregal's soul before you get to hear more of Adrasteia's song again. A few lines later, you get to take control of Moia one more time in order to kill another 20 guards.
-
With the guards defeated, more singing will occur before another return to Zamorak's Hideout. Bilrach will order Nymora, Jerrod, and Vengeance to kill Moia. They will refuse and we finally will reach the end of the song. With the final return to the Hideout, we will see Moia above Bilrach's freshly slain corpse and the Zamorakian army will bow to her.
-
The completion of extremely long cutscene will bring us back to the throne room where you will experience a strange power that doesn't seem good. After some chatter, the quest will complete and you will obtain your rewards.
Congratulations, Quest Complete!
This Quest Guide was written by 3ter 1 and ChathMurrpau.
This Quest Guide was entered into the database on Sun, Jul 02, 2023, at 03:47:35 PM by Chath, and it was last updated on Sun, Aug 31, 2025, at 07:23:37 PM by Chath.
If anything is incorrect or missing, or if you have any new information to submit to this database, please submit it to us on our Content Submissions Forums.
If you see this guide on any other site, please report it to us so we can take legal action against anyone found stealing our content. This guide is copyrighted by RuneHQ, and its use on other sites is expressly forbidden. Do not ask if you can use our guides or images, the answer is and always will be NO!
Print this page with images - Back to the Quest Guide Index Page - Back to Top
